
Data Stores
Creating Data Stores
1. In order to create a Data Store, you must be logged in as a User with permissions to Edit Data Stores.
2. From the Laboratory Home Page, select the Create New Data Store link under the Lab Tools heading near the bottom of the page.
3. You will be directed to a page for defining a new Data Store. Enter values for each of the input fields as described below:
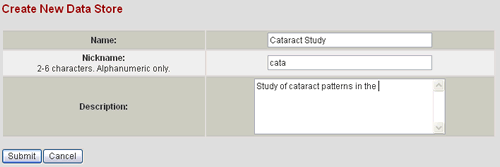
| Name | Name of the Data Store. This name will be displayed at the top of each page when performing actions within the Data Store (e.g. viewing items, adding items, etc). This name will also be displayed in the Data Stores list on the Laboratory Home Page and the Data Store List Page accessible from the Lab Home Page navigation bar. |
| Nickname | The nickname will be used as an identifier for the Data Store that is used within the system. This short alphanumeric identifier is a useful for database and CGI programming conventions. You will likely never need to know this identifier although you may encounter it if you use the Advanced Query feature for composing SQL queries. The nickname must be unique within the laboratory system. An error will be displayed when you submit the form if the nickname is a duplicate, and you will be able to modify it and resubmit. |
| Description | The Data Store description is displayed in the Overview section of the Data Store Home Page. It is also displayed along with the links in the Data Stores list on the Laboratory Home Page and the Data Store List Page accessible from the Lab Home navigation bar. |
4. Select the Submit button.
5. The new Data Store is created at this point. A page will be displayed for you to start defining the Data Classes for your Data Store. See Creating Data Classes for more details about this step. You may delay creating Data Classes for a later time by selecting the Cancel button.