Queries
Creating a Query
There are two different methods for querying your laboratory database. A simple query uses a generic interface generated using properties of the attributes of the Data Class being queries. An advanced query allows you to compose a SQL SELECT statement for viewing results output by the database. Each method is described in more detail below.
Creating a Simple Query
Creating an Advanced Query
Creating a Simple Query
The simple query method provides users with a dynamically generated user interface for finding items belonging to a particular Data Class. The query widget property of the Data Class attributes determines what web form input field to use in the interface.
1. In order to create a simple query, you must be logged in as a User with View Items permissions.
2. Navigate to the Data Store Home Page for the Data Store that contains the items you want to find.
3. There are two methods to get to the simple query interface as described below:
a. Under the Data Classes section is a list of the current
Data Classes defined for this Data Store. Find the Data Class that contains
the items you want to search for. In the Actions column for the Data
Class, select the query icon link ![]() (if
this icon is grayed out, this means you do not have permissions to view
items. Contact your administrator if you think this is an error)
(if
this icon is grayed out, this means you do not have permissions to view
items. Contact your administrator if you think this is an error)
b. Under the Saved Queries section, find the Simple Queries
heading and select the add icon link ![]() .
From the page that appears, select which Data Class you want to query
items from. Select the Next button
.
From the page that appears, select which Data Class you want to query
items from. Select the Next button
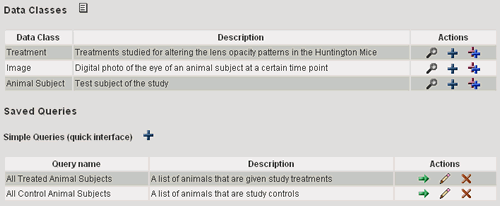
4. The simple query form will be displayed for the selected Data Class. In the Constraints column, enter constraint values for any attribute. Leaving the default values indicates no constraint for that attribute.
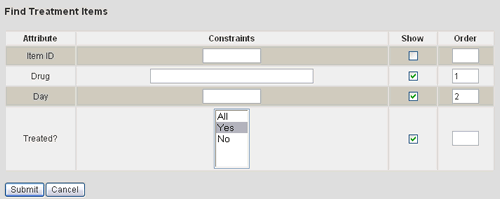
5. In the Show column, select which attributes you want to show in the list of results.
6. In the Order column, place a number (1, 2, etc) indicating which attributes you want to sort by. The results will first be sorted by the attribute with order 1, next by the attribute with order 2, etc. For attributes for which the order is left blank, the database will automatically select its sort order.
7. Select the Submit button.
8. The query results will be displayed. You can reorder the results by revising the order numbers at the top of each column and pressing the Re-Sort button.
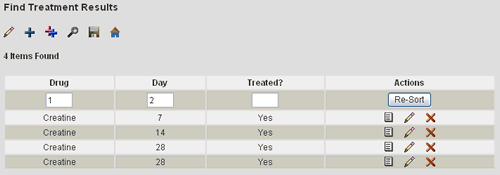
The Actions column contains useful links described below:
| View the profile displaying all attribute values for this item | |
| Edit this item | |
| Delete this item |
Other useful links are provided before the list of results as described below:
| Edit multiple items from the list of query results | |
| Add a single item for this Data Class | |
| Add multiple items for this Data Class | |
| Create another query for items in this Data Class | |
| Save this query for future use | |
| Return to the Data Store Home Page |
Creating an Advanced Query
The advanced query method allows you to perform very powerful queries. You can perform any query defined by the SQL SELECT statement. CELO performs a couple of extra processing steps to make the output of some queries more useful. This processing is described below.
1. In order to create an advanced query, you must be logged in as a User with permissions to View Items.
2. Navigate to the Data Store Home Page for the Data Store that contains the data for which you want to perform the query.
3. Under the Saved Queries Section, look for the Advanced
Queries heading. Select the add icon link ![]()

4. At the top of the Advanced Query page is a listbox with all the Data Classes available to use in your query. This includes the system wide default Data Classes, User, File, and URL. Select the Data Classes you want to use in your query and press the Display button. This will display the names of the real tables in the database used to store the Data Class items. It will also display column details for each of these tables.
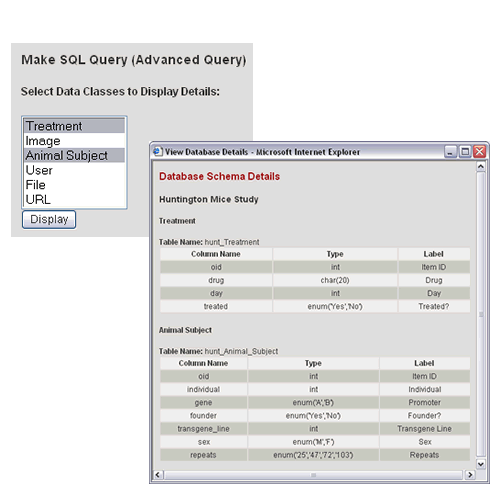
5. Using the actual database names, construct your SELECT statement in the "Enter MySQL SELECT Statement to Execute:" box. Some processing performed by the system to note includes:
- Any columns specified with the name "oid" will display the word "link" as a link to the profile of the item with the oid value instead of the actual oid value.
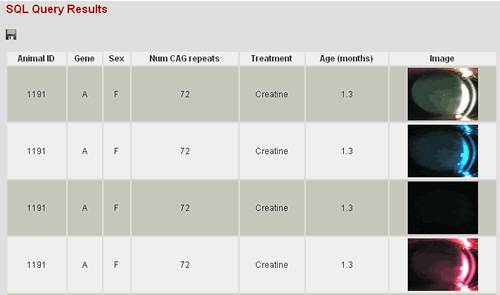
- The column name "locator" is a reserved column name in the CELO system. Any column specified with the name "locator" will therefore display either 1. an image thumbnail if the locator value specifies a file with an image extension or 2. a link to the file specfied by the locator value

6. Select the Submit button to submit your query statement
7. The results will be displayed in a table. Useful links are displayed above the results table and are described below:
| Saved this advanced query |
