CELO Installation and Setup Guide
The steps for installing and setting up a CELO server are:
- Install WIRM
- Download CELO source code into WIRM root folder
- Install Perl modules for XML parsing
- Run install.pl
- Check the website
- Test the Installation
These instructions also include details about how to uninstall CELO
1. Install WIRM
A working WIRM system is required before CELO can be setup.
1.1 Follow the steps in the WIRM Installation Guide (NOTE: The WIRM-2.0 release is missing some required features, please wait for a newer release.)
1.2 Make sure the installation is successfully running by creating a new test repository
2. Download CELO
2.1 Install the latest CELO source code into the WIRM root directory using one of the following methods:
- checkout from Structural Informatics Group CVS directory src/celo (you must have a valid login and password)
- download and unpack (tar -zxvf celo-1.0.tar.gz) the source code package
4. Install Perl modules for XML parsing
4.1 Download and unpack the following Perl modules from CPAN.org
4.2 To install each module, use the following commands:
perl Makefile.PL
make
make install
5. Run install.pl
5.1 To successfully run the install script, you must be a user with permissions to add directories to the Apache web server directory (e.g. /usr/local/apache) and with PATH environment variable including MySql server path (e.g./usr/local/mysql)
5.2 Navigate to the celo root directory under <wirm root>/celo (or wherever you put the celo sources)
5.3 Run install.pl
5.4 Enter the MySQL password when prompted
The install script will perform the following actions. Use this list as a guide for troubleshooting any problems you run into:
- Creates new directories
(Troubleshooting: Check the paths in <> in celo-conf.pl and make sure you have write permissions for these paths)
| DIRECTORY | DESCRIPTION |
| <wirm root>/labs | Where directories for each lab system will be created |
| <web server cgi directory>/labs | Where symbolic link to the cgi-bin directory for each lab (in the celo install dir) will be created |
| <web server htdocs directory>/labs | Where symbolic link to the htdocs directory for each lab (in the celo install dir) will be created |
| <var directory>/labs | Where uploaded lab data files will be stored |
- Creates symbolic links
| SYMBOLIC LINK | DESCRIPTION |
<celo install>/cgi links to |
Allows you to work with files in the celo install directory instead of directly in the web server directory |
| <celo install>/htdocs links to <web server htdocs directory>/celo |
Allows you to work with files in the celo install directory instead of directly in the web server directory |
- Makes perl scripts executable
Gives owner read/write/execute permissions for all files in <celo install>/lib and <celo install>/cgi
- Creates celo_main database
(Troubleshooting: PATH must include MySql bin path and you must know the MySQL password)
| DATABASE TABLE | DESCRIPTION |
Research_Labs |
Stores a list of research labs that register for a system |
| Templates | Stores a list of templates that labs can use to help define database schemas |
- Creates 'celo' Linux group
(Troubleshooting: Determines the current user and apache user to add to 'celo' user group with the following commands:
id -un
grep ^User $WRM_CONF{apache_root}/conf/httpd.conf
Make sure these return valid users)
- Give new 'celo' group read/write/execute access to the appropriate
directories
(this is to make sure that only the current user or web server can write to these directories)
| DIRECTORY | DESCRIPTION |
| <celo install>/templates | Where template files are stored |
| <wirm root>/labs |
Where directories for each lab system will be created |
| < web server cgi directory>/labs | Directory for CGI script for labs |
< web server htdocs directory>/labs |
Directory for webpages for labs |
< var directory>/labs |
Where uploaded lab data files will be stored |
6. Check your website
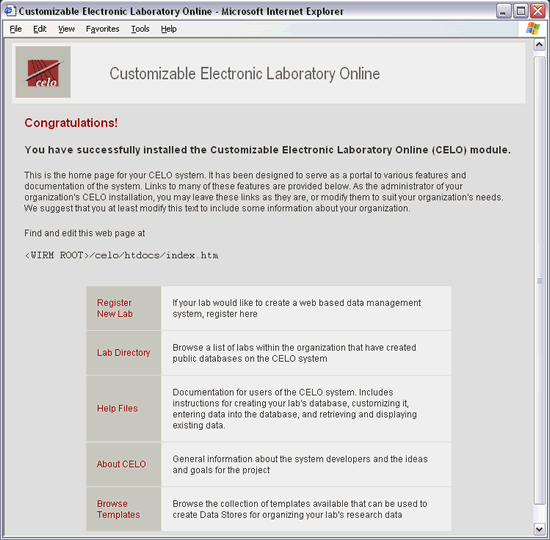
Using a remote browser, verify that the CELO Main Page can be accessed. The web URL should be
<your web server name>/celo/index.htm
(index.htm may be optional if the web server is set up indicating index.htm as the default page name)

7. Edit the CELO Home Page to fit your organization's needs
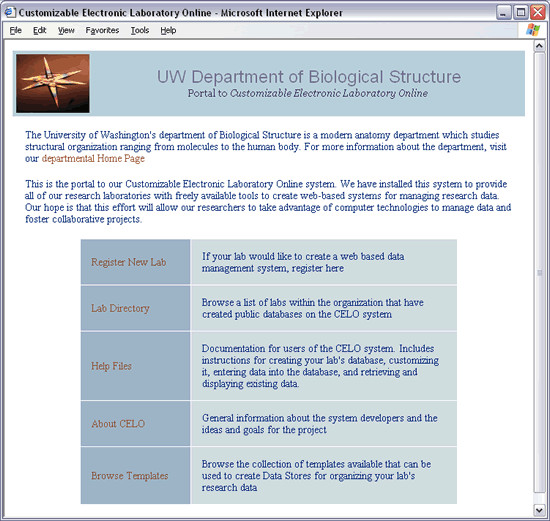
Note that the content of the CELO Home Page is not appropriate for the end users. You may edit the text to provide information tailored to the specific interests or needs of your research organization. The web banner image and text can also be easily modified if desired.
7.1 On the CELO server open the file <WIRM Root>/celo/htdocs/index.htm
7.2 Edit the html as desired. It is recommended to leave the table with the links as it serves as a portal to essential components of the CELO system. This critical HTML code is clearly marked in the file.
7.3 Save and close the file. Refresh the client browser to verify the changes.
7.4 If desired, you can also edit the default web display styles for your organization. Edit the Cascading Style Sheet (CSS) file in <WIRM Root>celo/htdocs/css/celo.css
Here is an example of how you might want to edit the main page html.

8. Test the Installation
8.1 Test the installation by going through the tutorial
8.2 After the installation has been verified, remove the tutorial by running uninstall.pl and specifying "tutor"
Uninstalling CELO
If you ever need to uninstall CELO, you can easily do this with the uninstall script
1 To successfully run the uninstall script, you must be a user with permissions to delete directories on the Apache web server directory (e.g. /usr/local/apache) and with PATH environment variable including MySql server path (e.g./usr/local/mysql)
2 Navigate to the celo root directory under <wirm root>/celo (or wherever you put the celo sources)
3 Run uninstall.pl
4 When prompted, do not enter anything in order to uninstall all laboratory systems
5 Enter the MySQL password when prompted to delete each database
6 Delete the CELO directory (with source code) to completely remove the system
