Entering and Editing Data
Editing Items
After you have entered items into the database, you may need to edit some of the items.
Two interfaces are provided for editing existing items in the database. One interface allows you to edit a single item at a time. The second interface allows you to edit multiple items at one time. In order to access either of these interfaces, you must first find the item(s) you want to edit in the database. Each method is described below
Editing a Single Item
1. In order to edit an item in the database, you must be logged in as a User with permissions to Edit Items.
2. Navigate to the Data Store Home Page for the Data Store that contains the item you want to edit.
3. You must now find the item you want to edit. Click
on the find icon ![]() in
order to perform
a simple query. Be as specific as you can in order to find the
item.
in
order to perform
a simple query. Be as specific as you can in order to find the
item.
4. In the query results, find the listing for item you need to edit.
In the Actions column, select the edit icon link ![]()

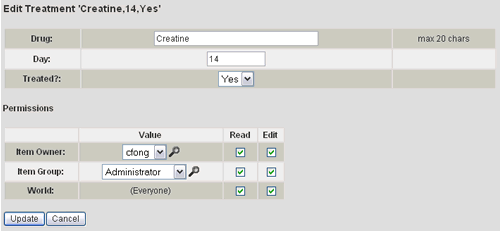
5. You will be directed to a page with the input fields that specify the current attribute values for the item. Make any necessary changes.

6. Select the Update button.
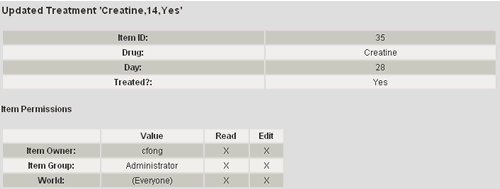
7. You will be directed to a page showing the new values for the item you just updated. Verify that the values are correct. If you need to make additional changes, select the edit icon link near the top of the page.

Editing Multiple Items
1. In order to edit items in the database, you must be logged in as a User with permissions to Edit Items.
2. Navigate to the Data Store Home Page for the Data Store that contains the items you want to edit.
3. You must now find the items you want to edit. Click
on the find icon ![]() in
order to perform
a simple query, being as specific as you can in order to find the
items. Note that you can only edit multiple items belonging to the
same Data Class.
in
order to perform
a simple query, being as specific as you can in order to find the
items. Note that you can only edit multiple items belonging to the
same Data Class.
4. In the query results, select the edit icon link ![]() near
the top of the page.
near
the top of the page.

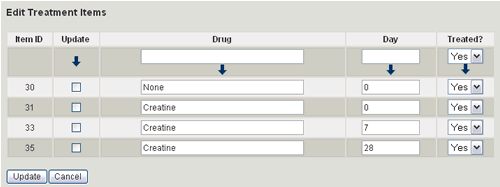
5. You will be directed to a page with the input fields that specify the current attribute values for each item found in your query. Make any necessary changes. Ignore the Update column for now.

Note that the first row is a tool for propagating a given attribute
value to every row in the form (this makes it efficient to update an
attribute to the same value for multiple items). To use this feature,
enter the value and select the propagate icon ![]() .
.
6. In the Update column, select the checkboxes for the items you want to update. This features allows you to update only the items you want.
7. Select the Update button.
8. You will be directed to a page showing the new values for the items
you just updated. Verify that the values are correct. If you need to
make additional changes to individual items, select the edit icon link
![]() under the Actions
column for that item. If you need to make additional changes to multiple
items, select the edit icon link
under the Actions
column for that item. If you need to make additional changes to multiple
items, select the edit icon link ![]() near
the top of the page.
near
the top of the page.

